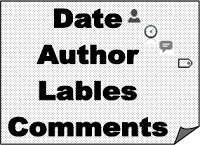
 Show date, post author and numbers of comment per post in just one line below your post title in your blog. It helps your visitor to know about at which time you have post this article and who is the author and how many comment has been posted so far. This widget is almost used by every Blogger and we recommend you to use our simple and easy to customize code and make the link in your blog post too. The code is too simple you can even break the code and add that you want and remove the thing that you dont want.
- Go to your Blogger account and open the template tabs right of your Blogger dashboard.
- Click on the edit HTML and open it. The new window appears with your template codes.
- Now press Ctrl + F the new light box will appears and put the below code in to it to find the correct code.
<div class='post-header-line-1'>
|
If you can not find this code, find this code in your template.
<div class='post-header'>
|
Now past the below code just above the code that you find in your template.
<font style='background:transparent url(https://blogger.googleusercontent.com/img/b/R29vZ2xl/AVvXsEgYQyFR089W-wvObp1iciTAzxRzgOoF1ON5H8Jg5hLcamzN3FS6-k7bpDhkjgVxQhLGqbCeO4TOBDIQEMq4-YYwWc3KG1KsVvIF1w8ZwXaXepKcKy0VYqn3BZHds1McgVS4Z3swHhNJl7Q/s1600/ReverBlog+-+author.gif) no-repeat scroll top left;padding-left:25px;font-size:11px;'><data:post.author/></font> | <font style='background:transparent url(https://blogger.googleusercontent.com/img/b/R29vZ2xl/AVvXsEh9OieUEFFJyuqUG9gw9FZAODWDfX6YdCzbckfmSYo2Aotw24Xu6W8GAvU_f42LAXdJEEY0fDp06GlFdaE0qvQaC6YcdhRiD3gOTaJFS82NxFTz369N02GbqVneMz5czl1pLGB0Z7pegs8/s1600/ReverBlog+-+clock_icon.gif) no-repeat scroll top left;padding-left:25px;font-size:11px;'><data:post.timestamp/></font> | <font style='background:transparent url(https://blogger.googleusercontent.com/img/b/R29vZ2xl/AVvXsEiV1ZDVvB3Xr5R5UcgQbz1F1O1rfF6UTU1tRA7eUpnf8EHSLn1biuBhelFrQYFIVTNYqj4f0-WxXA05ThFri6gkKcLPUAINTZdRvWSj1x4bqD0BztvKot3fvZfdHmkdNif-Ob6jvNu98ow/s1600/ReverBlog+-+tag+icon.gif) no-repeat scroll top left;padding-left:25px;font-size:11px;'><b:if cond='data:post.labels'>
<b:loop values='data:post.labels' var='label'>
<a expr:href='data:label.url + "?max-results=8"' rel='tag'><data:label.name/></a>
<b:if cond='data:label.isLast != "true"'>|</b:if>
</b:loop>
</b:if></font>
<span class='post-comment-link' style='Float:right;'>
<b:if cond='data:blog.pageType != "item"'>
<b:if cond='data:post.allowComments'>
<a class='comment-link' expr:href='data:post.addCommentUrl' expr:onclick='data:post.addCommentOnclick' style='background:url(
</b:if>
</b:if>
</span>
|
- The Red URL shows the link of author image.
- The Orange URL shows the link of Date image.
- The Yellow URL shows the link of tag image.
- The Green URL shows the link of comment image.
Now save your template and refresh your blog when your preview your blog you will able to see the Date, Author and Comments line below your post title.
Please give us your positive feedback and also share your experience with this post. facing any difficulties with this code, do let us know we will solve your problem.
Please give us your positive feedback and also share your experience with this post. facing any difficulties with this code, do let us know we will solve your problem.


0 comments:
Post a Comment
Share your Feedback and suggestion with us. Any question or need some please contact us and get instant help. Do not post Spam or Back links comments. If spam or post backlinks comments on this blog, your comment will be deleted.